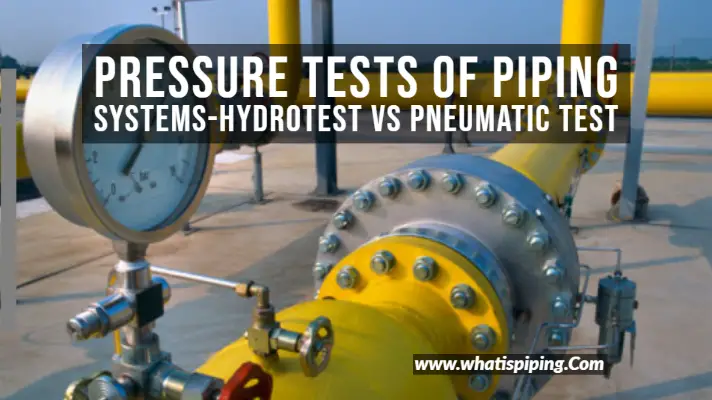
Hydrostatic testing of pipelines ensures the overall integrity of the system. It is a leak testing method performed in all liquid and gas pipelines before the first content throughput. The term hydro is related to water, so pipeline hydrostatic testing is performed using water as the primary test media. The water inside the pipelines is pressurized and the joints are then inspected for any possible sign of leakages. In this article, we will learn the following:
- Definition of pipeline hydrostatic testing
- Pipeline hydro test pressure
- Pipeline hydro test procedure
Definition of Pipeline Hydrostatic Test
Pipeline hydrostatic testing or hydro testing of pipelines is a non-destructive testing method to evaluate the strength and integrity of pipelines. It ensures that the pipelines can safely operate at their maximum operating pressure. Hydrostatic Testing is a standard practice in the oil and gas, water, and chemical industries wherever liquid, gas, or water pipelines are used to verify that pipelines can withstand their intended service conditions without leaks, ruptures, or other structural failures.
So, the main purpose of Hydrostatic testing pipelines is to ensure the pipeline’s operational fitness. The pipeline hydrostatic test is also known as pipeline pressure test, hydrostatic pressure test, or pipeline pressure testing.
Hydrotest Pressure of a Pipeline
The pressure at which the pipeline hydrostatic test or pipeline pressure test is performed is known as the test pressure. The hydrostatic test pressure for pipelines is designed based on the guidelines provided in the ASME B31.4 code for liquid pipelines and the ASME B31.8 code for gas pipelines. In general, the test pressure for the pipeline system is selected as the minimum of
- 1.25 times the design pressure
- the pressure that creates a hoop stress of 90% SMYS of the material.
- the test pressure value of the weakest component in the pipeline system.
Pipeline Hydrostatic testing is performed once the pipeline is erected and constructed at the site. As the pipeline profiles vary based on the soil/land elevations, the pressure will not be constant at each point of the pipeline. So, the elevation profile must be plotted to check that the test pressures at the low and high points will not result in pressures or combined stresses outside the above limits.
Working Principle of Hydrostatic Testing of Pipelines
The working philosophy of pipeline hydrostatic testing is as follows:
The pipeline section is filled with treated water and then gradually the pressure is increased till it reaches the hydrotest pressure as defined above. This pressure is more than the pipeline’s design pressure. Once the test pressure is reached, the pressure is held for a certain timeframe and then all joints are visually inspected for any possible leakages. If leaks are found in any section, those are marked. Once the full section is inspected, the pipeline is depressurized and water is removed. Vent and Drains must be installed in the pipeline to help in air escape while water filling and draining water once the test is complete.
Sequence Steps for Pipeline Hydrostatic Test Procedure
Fig. 1 below shows the sequence of hydrostatic pressure testing operations of pipelines.

The hydrostatic testing must be performed by a highly experienced pipeline hydro test engineer. Each organization usually has its own procedure for pipeline pressure testing operations. The procedure for pipeline hydrostatic test includes:
- Detailed list and schedule of the main activities, tests, and responsible personnel.
- Details of test sections with approved hydro test diagram.
- Potential safety and environmental hazards Identification
- Details of water source, treatment methods, disposal, permit requirements, etc.
- Test section preparation details, including temperature stabilization.
- Hydrostatic test details
- Post-test activity details
- Rectification activity details (Leak rectification when a leak is observed, dewatering, etc)
- Hydrotest water disposal plan.
Hydrostatic Testing for Buried Pipelines
Hydro testing of aboveground pipelines is comparatively easy as the test section can be visually inspected. But for buried or underground pipelines, the same is not quite possible.
For buried pipelines, the complete hydrostatic pressure test is performed in two steps. Initially, the pressure is increased to the hydro test pressure and left for a certain period of time and its strength is tested. In the next step, a leak tightness test is performed to assess any possibility of leaks. A leak tightness test is performed immediately after the strength test using the same water in the pipeline. To allow for pressure variations due to temperature changes during the test duration, the hydrostatic test pressure is set at a level of 1.1 times the design pressure. For all buried pipelines and flowlines the minimum duration for the hydrostatic pressure test is generally 4 hr strength test followed by a 24 hr leak tightness test.
During the leak tightness test, the pressure is continuously recorded to find any variation. The pipe, soil, and air/sea-water temperature is also recorded at 1-3 hour intervals for calculating pressure-temperature variation.
If the recorded pressure is found to be stable after accounting for the pressure-temperature variation, it can be concluded that there are no leaks.
Hydrostatic Test Equipment
All the temporary fittings, piping, test heads, pumps, pigs, materials, equipment, and consumables used for the pressure testing operations are part of hydrostatic test equipment. The term hydro test equipment does not mention a single equipment, but it refers to all the components required for a successful hydrostatic testing process.
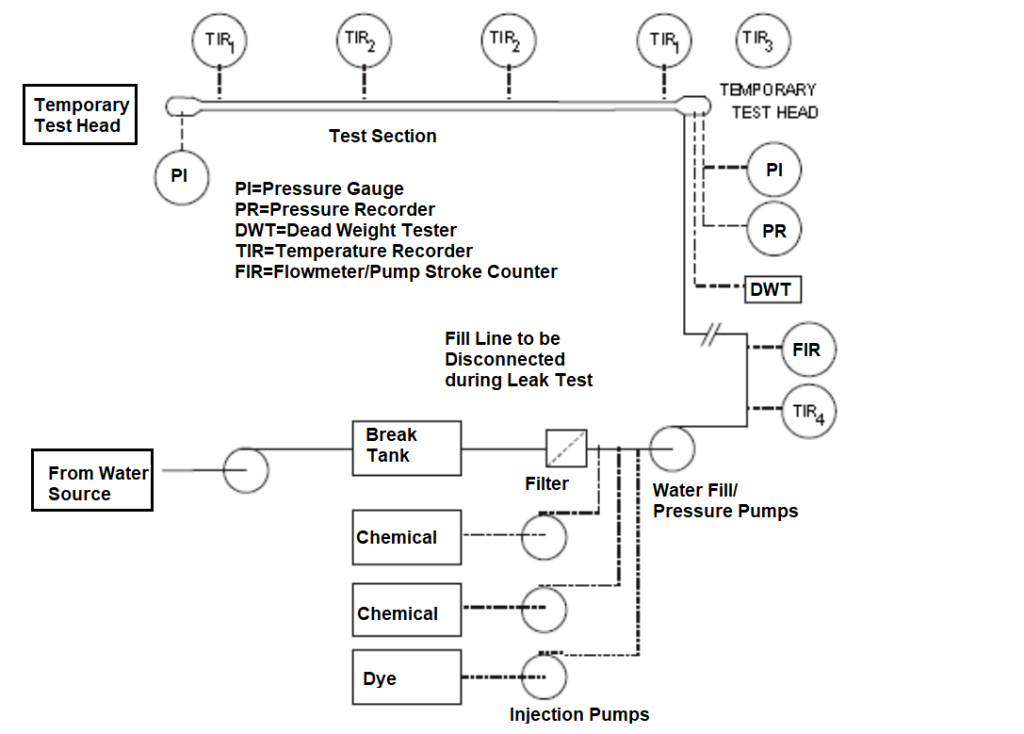
In general, the hydrostatic test equipment consists of the following equipment/components:
- Filling and pressurizing pumps
- Filters
- Valves
- Break Tanks and Piping
- Chemical Injection Pumps
- Air-conditioned or heated test cabin unit
- Deadweight tester
- Pressure data logger
- Filling/Pressurising flowmeter and temperature probe
- Pipe wall temperature recorder
- Pressure Gauge
- Ambient air temperature recorder
- Soil/Subsea temperature probes and recorder
- Pressure relief valve
- Pressure let-down valve
- Temporary pig launchers and receivers
- Pigs
- Test Head
- Air Compressor
- Communication equipment
- Stand-by facilities
A schematic hydrostatic test equipment layout for a typical pipeline test section is shown in Fig. 2 below:
The following video clearly explains the hydrostatic test procedure of a natural gas pipeline
Frequently Asked Questions
Here are some of the frequently asked questions related to hydrostatic testing of pipelines for your ready reference:
All new pipelines must be hydro-tested before commissioning. For existing pipeline systems, if any repair or alteration is made, then a hydrostatic test needs to be performed before bringing them into operation.
In general, the pipeline hydro test pressure is calculated as 1.25 times the pipeline design pressure. However, there are other considerations as mentioned in the article above.
Pipeline hydrostatic testing is performed by following the guidelines given in ASME B31.4 for liquid pipelines and ASME B31.8 for gas pipelines.
The hydrostatic testing of pipelines ensures the structural integrity and leak tightness of the pipeline system.
The duration of the pipeline system is decided based on various factors like the type of pipelines (aboveground or buried), the total number of pipeline joints, the length of the test pipeline section, hydrostatic testing equipment capacities, manpower employed for the test and inspection, temperature stabilization time, etc. In general, a minimum of 4 hours is required for aboveground pipeline hydrostatic testing and 24 hours is required for underground pipeline systems.

