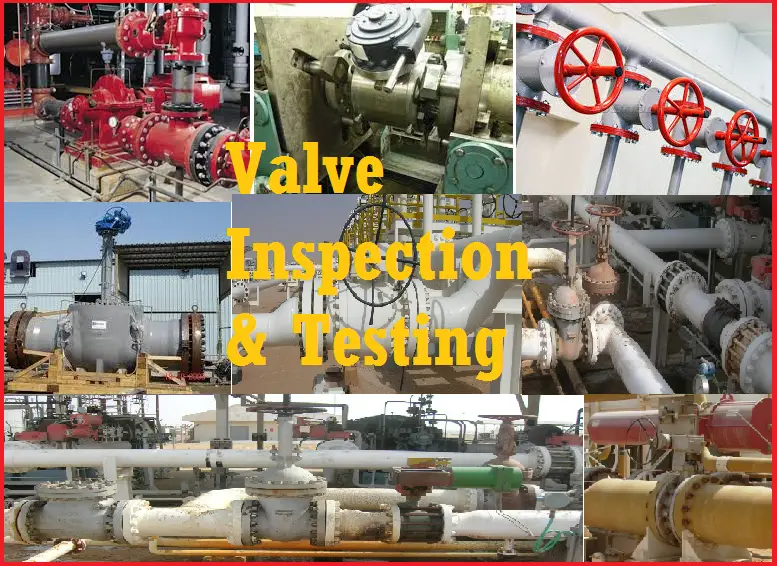
Valve Inspection and Testing is an important subject for piping professionals as it ensures the integrity and performance of Valves during plant operation. During the shutdowns of operating plants, hundreds of valves tend to have various needs to be inspected. Also before use in new plants (during the design phase), the valves must be inspected thoroughly in the manufacturer’s shop to ensure proper quality.
API STD 598- Valve Inspection and Testing provides guidelines for the inspection and testing of valves and the test is conducted by the valve manufacturer. This Valve Inspection article will provide you with some important points related to the inspection of valves and valve testing in the manufacturing shop as well as in operational plants.
Normally the following tests and examinations are performed on Valves/Components.

Shell Test
Required for all valve types. The shell test validates the strength and soundness of the valve pressure-containing structure. This is actually a pressure test where normally air, inert gas, water, kerosene, etc can be used as the test fluid. The minimum shell test pressure that can use are listed in table 2 of API-598. The pressure is applied inside the assembled valve with the ends closed. The valve shall be partially open and be able to hold pressure for a certain time. The pressure shall not be less than 1.5 times of maximum working pressure. No leakage is allowed.
Backseat Test
Required for all valves that have the backseat feature, except for bellows seal valves. This is a feature that allows valve packing to be replaced while it is in service. Normally gate valves, globe, and parallel slide gate valves are subjected to this test. This pressure test is performed to verify leakage past the stem or shaft to the bonnet seal i.e, backseat. Table 3 of API-598 provides the required test pressures for the backseat test for different valve types. In this test, the valve shall be fully opened and the packing gland shall be loose or not installed. No leakage is permissible in the backseat test.
Low-pressure closure test/ High-pressure closure test
Closure tests are performed to confirm leakage past or through a valve’s closure mechanism. The Closure Test or Valve Seat Leak Test is performed after the successful completion of the Valve Body Test/shell test. One side of the valve inlet or outlet shall be subjected to the hydrostatic pressure and the amount of leak shall be measured on the opposite side of the valve.
To explain it, if you are pressurizing the valve inlet, then you have to measure the amount of leakage in the outlet. For both low-pressure and high-pressure tests leakage through the disc, behind the seat rings, or past the shaft seals is not permitted. However, a limited amount of leakage is permissible at the seat-sealing surface interface which is listed in table 5 of API-598.
Double block and bleed (DBB) high-pressure closure test
Pressure shall be applied successively to each side of the closure and Leakage into the body cavity shall be checked.
Visual examination of castings
A visual examination must be performed on all castings to ensure conformance with MSS SP-55.
High-pressure pneumatic shell test
When specified in the purchase order, a high-pressure pneumatic shell test shall be performed. This test shall be performed after the shell test, using appropriate safety precautions. The pneumatic shell test pressure shall be 110 % of the maximum allowable pressure at 38 degrees C (100 degrees F) or as specified in the purchase order. Visible leakage is not allowed.
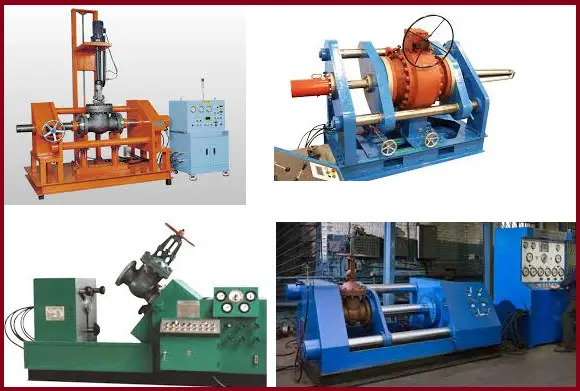
Table 1 of API 598 specifies the pressure test requirements for various types of Valves. The test equipment should not apply external forces that affect seat or body seal leakage. The following figure shows some sample test equipment used for valve testing.

Codes and Standards for Valve Inspection and Testing
Valve inspection and testing must be performed for the smooth and safe operation of industrial processes. Major codes and standards that guide the inspection and testing procedure of a valve are
- API 598
- API 607
- API 6D
- BS 759
Third Party Inspection for Valves
Third-party valve inspection is normally carried out by the manufacturer, purchaser, and the representative from the third-party inspection agency. Usually, a list of documents is required to be produced before the valve inspector for his review. These documents are:
- Purchase Order of the Valve
- Valve Manufacture Quality Control Plan
- Valve Inspection and Test plan
- Data Sheet of the Valve
- All Approved Drawings drawings for the valve
- Valve Material Test Reports
- Welding Specification Procedures(WPS) and Procedure Qualification Records (PQR) for the Valve.
- Valve Welders Qualifications Reports
- Valve NDE Personnel Qualifications Reports
- Required NDE Procedures like Dye Penetration, Magnetic Particle, Radiographic, Ultrasonic, PMI Testing, etc. for the Valve.
- Heat Treatment Procedure of the Valve material.
- Valve Calibration Certificates for Test Equipment
- Hydrostatic Testing Procedure of the valve to ensure leak tightness.
- Closure Testing Procedure, Backseat Testing Procedure, and Water Quality Document
- Valve Preparation and Painting Procedure
- Valve Preservation, Packing, and Shipping Procedure
- Valve Packing List
Valve Material Inspection by Third Party
The original or authenticated copies of valve material mill certificates need to be available with the manufacturer. The representative of the third-party inspector examines these material certificates for compliance with design specifications or drawings. The review includes inspection and checks on:
- Certificate No.
- Heat or cast No.
- Chemical composition.
- Mechanical properties.
- Heat-treated condition.
- NDE applied and results.
- Surface finish
Valve material includes the body stem material, shell material, valve trim materials, ball, wedge or flap materials, operating components, support material, gland materials, anti-friction materials, well end, flanges, and any other specified component material. Then the inspector witnesses the materials identification on the certificates against the materials marking which is further verified with the valve drawing datasheet, material list, and other specifications.
Upon completion of the valve material inspection by the third part inspector, he issues an inspection visit report (IVR), that contains the following items:
- Confirmation of satisfactory document review
- Record of the endorsement of certification reviewed/witnessed
- Record of all non-conformities
- Record of any tests witnessed and the result

i enjoyed this brief article well spoken
please mention step by step process of shell, body and sheet test of valve.
Thanks for Sharing.
Nice article, short and weighted deatils.
Dear Sir or Madam,
We have a ball valve 14” #900, made by MICROFINISH use as control valve (TCV), in data sheet we found they tested pressure at inlet only 70 bar and DESIGN CONDITION test 102.1 bar @ (-46 degree to 38 degree celsius). For piping design, pressure is 153.2 bar @ (-46 degree to 38 degree celsius). So please help us What pressure do we need to leakage test?
Thank & Regards
Dieutv.
Email: dieu.tran@ncsp.com.vn
Actually the test pressure and standard are a part of the agreement between the vendor and the purchaser, for type of service fluid, operating temperature, valve material, If there is no such evidence in the purchase Order about the standard then, API 598 to be followed, and also as per the valve material ASME B 16.34 to be referred at the specific temperature. The give details are no sufficient to provide the test pressure applicable for the test.